

table of contents
table of contents
When your hose bib freezes, don’t wait for it to thaw- act now. The real danger isn’t the frozen water in your outdoor faucet. It’s what happens when the ice melts.
The ice in your hose bib expanded, froze and may have cracked the brass or copper. That ice is now a plug- and ironically, it might be the only thing holding your cracked faucet together.
Don’t wait for the frozen water to melt. Take control of the timeline and follow the steps in this guide. You’ll safely thaw the pipe, test for hidden fractures, and know if you dodged a bullet or if you need to call a licensed plumber.
{{exterior-faucet-replacement="/services/exterior-faucet-replacement"}}
Why Waiting Is The Wrong Move
The municipal water supply that’s delivered to your home is pressurized. It’s like a shaken bottle of champagne, and the ice in your hose bib is the cork.
When the ice plug thaws, the backed-up incoming water sprays out. If there’s a crack in the metal spigot, the water pressure helps the fracture grow.
Even worse, if the cracked portion is inside the exterior wall cavity of your home, hundreds of gallons of water will leak into your drywall, wood framing, insulation and flooring.
It’s vital to take charge of the thawing process yourself. It’s better to be there to assess the situation than have a major leak event happen while you’re at work.
Step 1: Never Do Any Of These Things When Thawing a Hose Bib

We’re leading with “what not to do” for a simple reason: we’ve seen panicked homeowners who encounter a frozen hose bib do crazy things.
“Ever see someone melt their siding trying to thaw out a spigot with a blowtorch?” our Responsible Master Plumber Steven Smith (RMP-43457) recalls. “Please don’t do that.”
Never Use These Five DIY Thawing Methods
We see these five DIY outdoor faucet thawing methods on way too many blogs. They’re dangerous and should be avoided at all costs.
- Don’t pour boiling water on it. This is the most common mistake homeowners make. The extreme temperature shock can shatter frozen metal and turn a small leak into a major outdoor plumbing repair.
- Never, ever wrap a heating pad around the fixture. If the pipe bursts and shorts out the heating pad, it’s a massive fire and electrocution risk.
- Never use plumbing heat tape on the spigot. Heat tape is safe and UL-listed. But it’s for preventing a freeze, not rapid thawing.
- Don't use a blowtorch or open flame. You’ll melt the ice- and everything around it. The internal rubber washers don’t stand a chance. And worst case scenario, you’ll set the wooden wall framing or insulation on fire.
- Avoid using a hair dryer. This theoretically works, but there are way too many caveats and precautions needed.
Don’t Apply Too Much Force
Don't force the handle with a wrench. If the stem is frozen, you won’t open the handle. You’ll snap the brass valve in half.
Now that you know the wrong things to do, let’s show you the safe, Mother-approved way to thaw out your frozen outdoor faucet.
Step 2: Locate Your Shut Off Valve
Prepare for the worst case scenario as you attempt to thaw the pipe- a sudden burst of pressurized water from the incoming municipal supply.
If you have a dedicated interior isolation valve for your outdoor faucets, find it now before you proceed. If you live in our DFW service area, this likely isn’t the case.
“Most homes down here don’t have dedicated valves for hose bibs,” Steven explains. “You need access to the main water supply to your whole house.”
Find your home’s main water shut off valve. It’s usually in a clearly marked box on the curb labeled “WATER”, or along the exterior wall near a faucet.
Whichever is the case: clear a direct path to the valve. If thawing your hose bib reveals a burst pipe, head directly there and shut off the water to your home.
Step 3: How to Safely Thaw the Hose Bib (DIY)
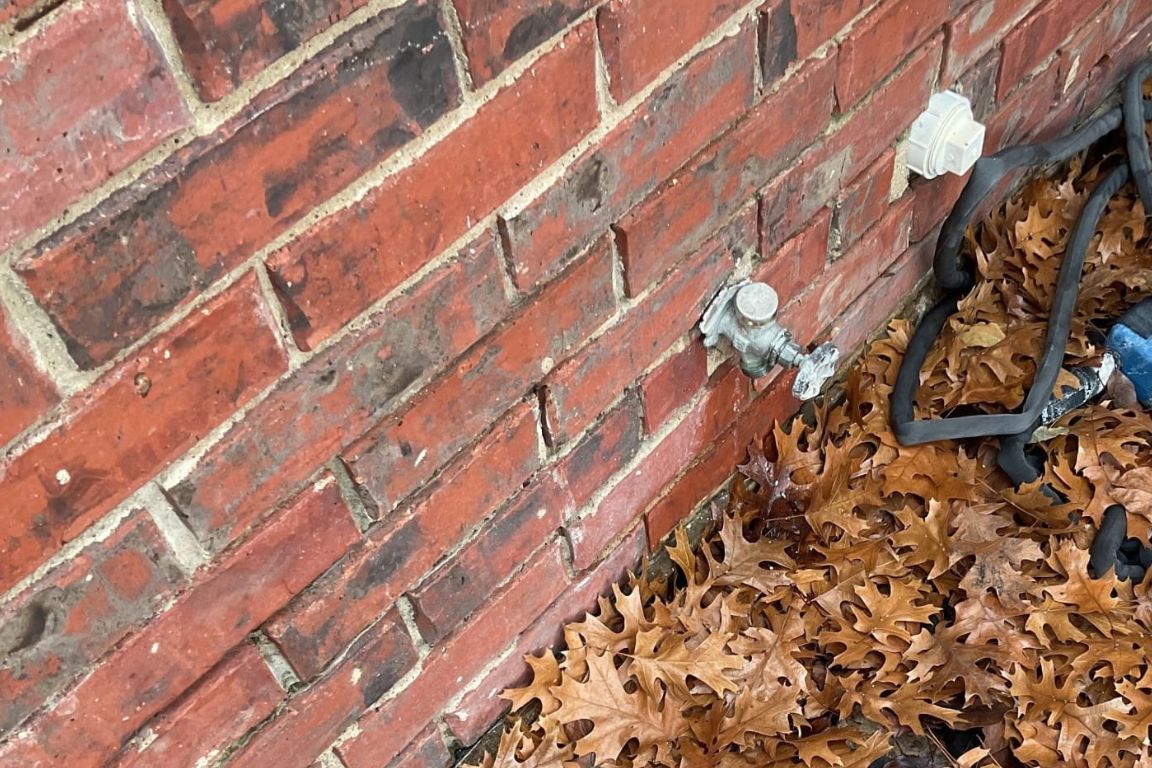
The key here is slowly raising the temperature to melt the ice plug. This accomplishes three things:
- A controlled release of the pressure in your spigot
- The avoidance of thermal shock that can crack your metal faucet
- A secure way to determine if your pipe is broken
There are many ways to accomplish this on your own. But only two of the DIY methods that appear in most online resources and blogs are advisable.
“You can DIY thawing out your outdoor faucet,” Steven says. “But there’s only one really safe way to go about it. Some of the advice you see online is not good.”
The right way to de-ice your hose bib is with hot towels. Wrap the spigot in thick towels. Then, pour hot (not boiling) water over the towels to increase warmth. You’ll gently increase the temperature of the outdoor faucet with zero risk of thermal shock or electrocution.
Before you apply the towels, gently open the faucet handle a quarter-turn. This gives the melting ice and trapped water a place to escape, which relieves the pressure inside the spigot.
Step 4: What to Check After You Thaw Your Hose Bib
The ice is melted. Now, let’s look around the area to see exactly what damage the expanding ice did to your outdoor plumbing.
Here are the four things to check, in this order:
- Look at the exterior of the faucet. Is there a visible hairline crack running down the side of the brass spigot? If yes, the metal failed.
- Turn the faucet on slowly. Does water spray out from anywhere it shouldn’t? Is there water coming from behind the handle or packing nut? If yes, then an internal seal or washer was ruined by the ice.
- If nothing happens when you turn it on. If you open the valve and no water flows, the ice plug is deep inside your wall cavity. Turn the faucet back to the "off" position immediately. You must call a licensed plumber to safely thaw the in-wall section before it bursts.
- Check the adjacent interior wall. Go inside the house to the wall that’s directly behind the outdoor faucet. Listen closely and touch the drywall very carefully. Do you hear hissing, or does the wall feel damp at all? If yes, you likely have a damaged pipe section inside your wall.
If you experience any wet drywall or a rushing noise inside the wall, call a licensed plumber immediately for non-invasive leak detection service.
If Your Frost-Proof Hose Bib Cracked: Two Possible Culprits
If you installed a frost-proof hose bib and still faced this issue, you’re probably shocked right now. But there are still two simple ways your frost-proof bib can still freeze.
1. You left a garden hose attached.
A frost-proof hose bib has a long stem that pushes the actual water shut off valve 12 inches inside your house. But if you left a garden hose attached during the freeze, the water had nowhere to drain out.
Instead, it froze inside the extra 12-inch chamber in the wall. It expanded and split the copper pipe inside your wall cavity.
2. The bib was installed incorrectly.
“Even if you did everything right and removed your hose for the winter, a frost-proof bib can still freeze if it was installed incorrectly,” Steven explains. “They have to be installed with a slight downward pitch. If it was installed perfectly level, gravity can’t drain the water out. It pools in the barrel, freezes and splits the pipe inside your wall.”
Step 5: DIY Fix or Licensed Plumber?
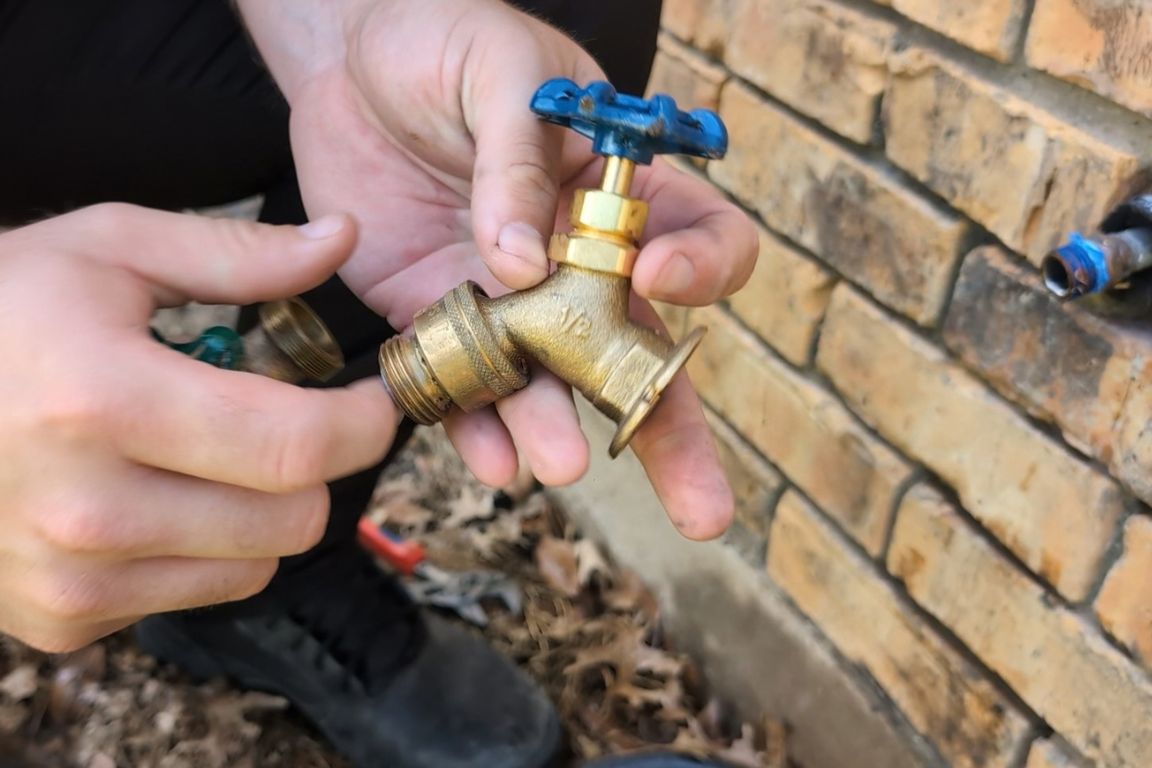
If you have a leaking or cracked hose bib caused by a winter freeze, let’s determine whether you can DIY the repairs or if you need to call a plumber.
Let’s examine the three most common scenarios and the right repair option for each.
Scenario A: Leaking from the Handle or Packing Nut
What’s happening: The ice compressed and ruined an internal rubber washer or the packing string.
The Verdict: You can DIY this. Grab a wrench. Tighten the packing nut or replace the internal washer. No plumber needed, and the parts are pretty cheap.
Scenario B: The Exterior Spigot is Cracked (Threaded)
What’s happening: The brass housing snapped, but the pipe in your wall is fine.
The Verdict: DIY if you’re handy, call a plumber if you aren’t. If your hose bib is threaded (screwed on) and you have two heavy pipe wrenches, you can unscrew the broken spigot and thread a new one on with plumber's tape. If you don’t feel comfortable with any of these steps, a licensed plumber can handle this quickly and efficiently.
Scenario C: A Soldered Bib or an In-Wall Leak
What’s happening: The pipe burst inside the wall cavity, or the exterior spigot is soldered (welded) to the copper pipe.
The Verdict: Always call a plumber. A licensed plumber will need to cut the copper pipe (often requiring drywall removal), weld on a brand new fixture, and verify the interior wall is safe from water damage.
Need a Licensed Plumber for a Frozen Hose Bib in DFW?
If there’s any sign of water inside your wall behind the outdoor faucet, turn off the water supply immediately and call a licensed plumber for emergency leak detection service.
Expect your plumber to use non-invasive location equipment like acoustic leak sensors and thermal imaging cameras to find the breach without tearing open your walls.
“If the ice cracked your pipe, don’t leave it,” Steven urges. “Structural rot and mold happen fast. Better to book pipe repair now then pay for mold remediation later.”
Need hose bib repair in Dallas-Fort Worth? Call Mother 24/7 for emergency faucet repair in and outside the home.
{{exterior-faucet-replacement="/services/exterior-faucet-replacement"}}