CIPP Lining: Everything You Need To Know
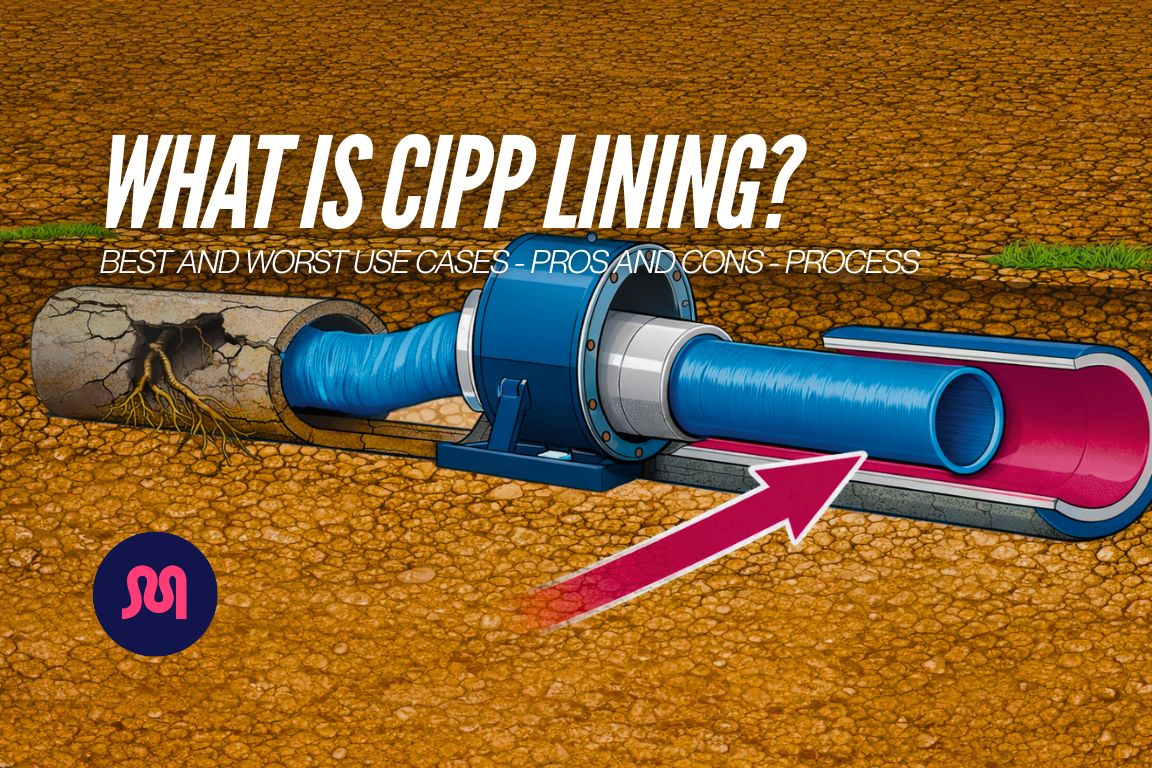

table of contents
table of contents
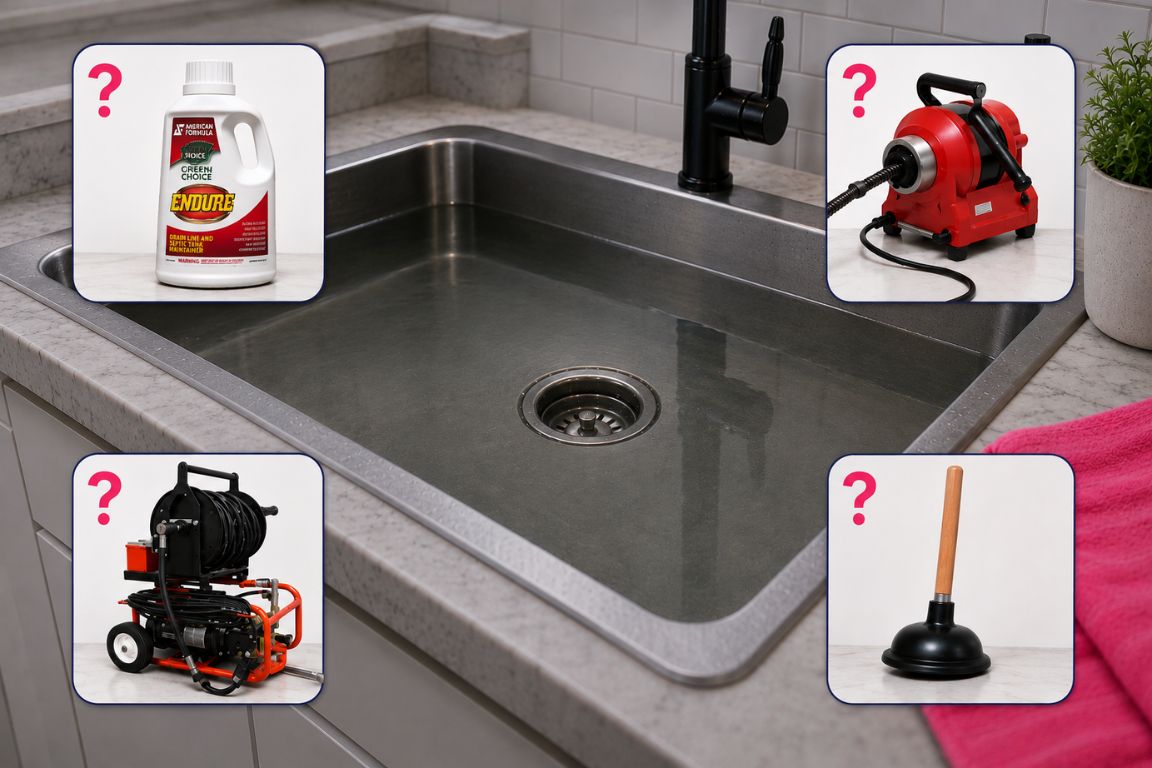
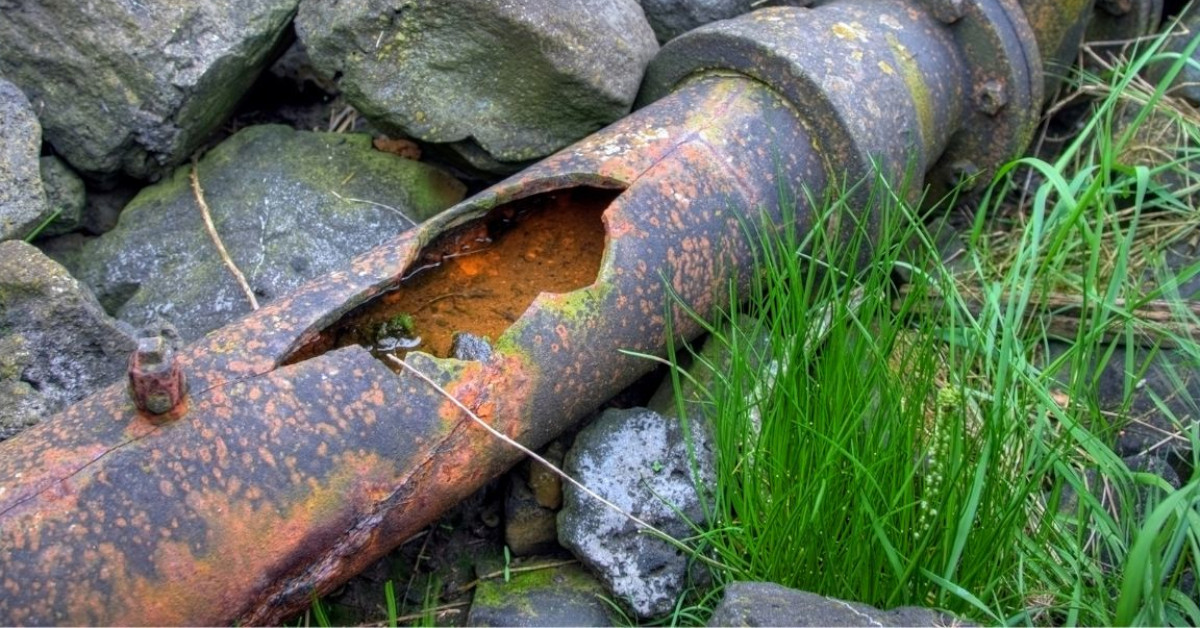
Your sewer line is damaged- those mature tree roots finally punctured your old, corroded cast iron. The quote for digging up your yard and replacing pipe sections made you wince. Your neighbor mentioned CIPP lining, but you have no idea what it is or if it works.
Mother’s Master Plumbers have installed CIPP lining in hundreds of Dallas-Fort Worth sewer lines. Our licensed techs use this trenchless repair method when it makes sense for the homeowner's specific situation- like root intrusion points and pipes under your hardscaping. We spoke to our Master Plumber Willy Dayton, who's conducted hundreds of CIPP sewer lining projects in California and Texas.
Cured in place pipe lining isn’t right for every sewer repair. It all depends on scope, severity and location of damage. In this guide, we'll explain exactly what CIPP lining is, how the process works, and when it's the right solution for your damaged sewer line.
Talk to a pro about CIPP lining vs other Dallas sewer repair options. Call Mother 24/7 for an honest evaluation of the right repair solution for your home.
{{sewer-line-repair-and-replacement="/services/sewer-line-repair-and-replacement"}}
What is CIPP Pipe Lining, Anyway?

CIPP lining is a sewer repair process that uses felt or fiberglass material to line the inside of your existing damaged sewer line. The acronym “CIPP” stands for Cured In Place Pipe- which tells you exactly what happens during the repair process.
Instead of digging up your entire sewer line to replace damaged sections, a plumber inserts a flexible fabric tube soaked in special resin into your existing pipe. That tube gets inflated to press against the inner walls of your damaged pipe, then heated or exposed to UV light until the resin cures (hardens in place).
Once cured, you have a brand new, seamless pipe lining inside the old one that seals cracks, blocks root intrusion points, and restores full function.
The beauty of CIPP lining is that it’s virtually trenchless. Your plumber only needs two access points- one through an existing sewer cleanout, and one small access hole at the other end of the targeted pipe section. (If you don’t have a cleanout, you’ll need two access holes.)
No trenching across your yard, no tearing up driveways, no destroying landscaping.
What is CIPP Lining Made Of?
The CIPP liner itself is a felt or fiberglass fabric tube that's been saturated with a liquid resin. Think of it like a flexible sock that's been soaked in a special hardening compound.
The resin is typically one of three types:
- Epoxy resin is by far the most common choice for residential sewer lines. It creates an extremely durable, chemical-resistant lining that bonds well to the host pipe and resists corrosion from wastewater.
- Polyester resin sees occasional use in residential applications but costs less than epoxy and doesn't perform quite as well in sewer environments. It's more commonly used for water lines or industrial applications.
- Vinyl ester resin is rarely used in residential sewer work. It offers performance between epoxy and polyester and appears mainly in specific commercial or industrial situations where chemical resistance matters but budget is tight.
The fabric tube that carries the resin matters too. Felt liners work well for most residential sewer repairs. Fiberglass-reinforced liners provide extra strength for larger diameter pipes or situations requiring more structural support.
When the resin cures- through heat, steam, or UV light- it transforms from a flexible, wet tube into a rigid, durable pipe that can last 50+ years.
CIPP Lining And Your Damaged Main Sewer Line

Think of your damaged sewer pipe like a tunnel with cracks in the walls. Water leaks out through those cracks, and tree roots grow in through the same openings. Traditional repair means tearing up your yard to replace the cracked tunnel sections.
CIPP lining takes a different approach. Instead of replacing the tunnel, it creates a smooth, waterproof tube inside the damaged one. The new tube doesn't have any cracks- it's one continuous piece- so water can't leak out and roots can't break in. The old damaged pipe becomes a protective shell around your new functional pipe.
The cured resin creates a pipe that's actually stronger than many original sewer pipes. Clay and cast iron pipes from the 1950s-1970s were the standard in Dallas-Fort Worth, but they crack and corrode over time. A properly installed CIPP liner made from epoxy resin resists corrosion, blocks root penetration, and handles the pressure and flow demands of residential wastewater for 50+ years.
One important detail: CIPP lining slightly reduces your pipe's inner diameter. Expect your new liner to reduce total diameter by up to ¼”. A 4-inch sewer pipe might become a 3.75-inch pipe after lining.
The CIPP Lining Process: How It's Done
Let's walk through exactly what happens when a plumber installs CIPP lining in your sewer line. The entire process typically takes one to two days for a residential sewer repair project.
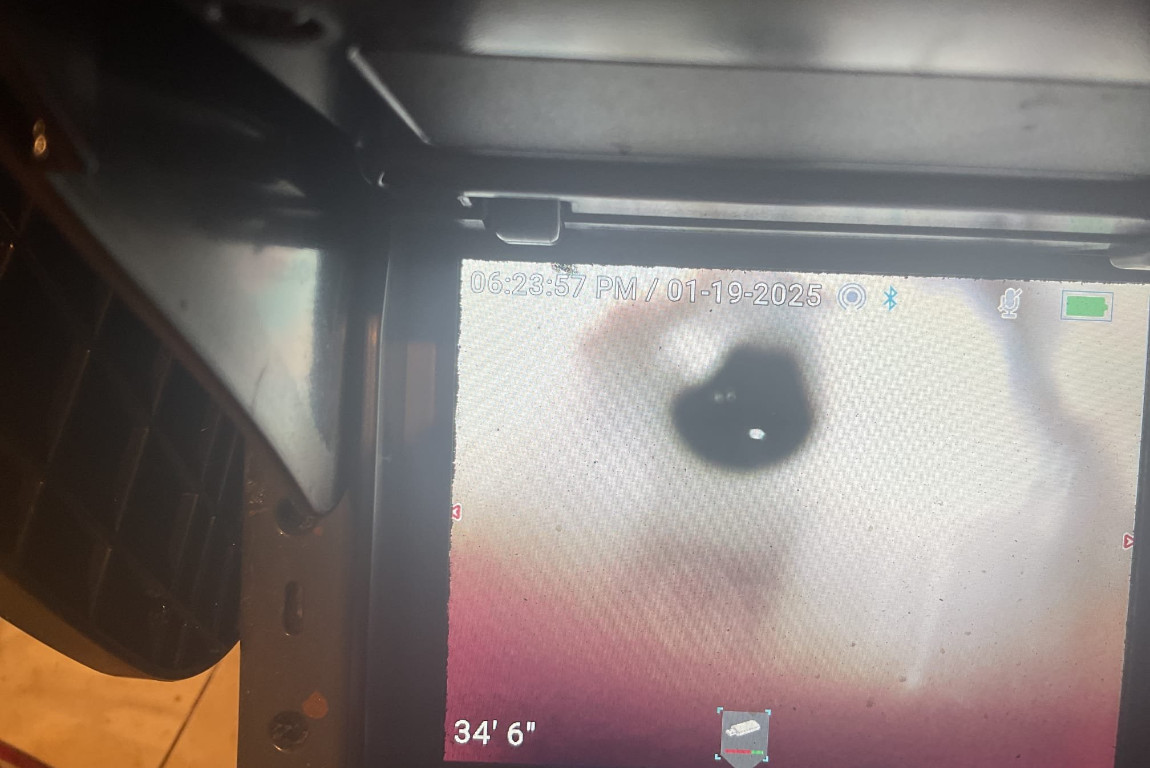
Step 1: Camera Inspection and Cleaning

Before any lining happens, your plumber runs a high-definition camera through your sewer line to assess the damage. This inspection identifies the exact location and extent of cracks, root intrusion, joint separation, or other problems.
Our Master Plumber Willy Dayton says the pipe must be properly graded (sloped away from your home) for CIPP lining to be effective- we establish this with pre-installation inspections.
"If a pipe's holding water because it's bellied or pitched towards the house, installing a liner will only preserve that same improper slope," Willy says.
Once your sewer line is inspected, the inside of your pipe needs to be completely clean for the resin to bond properly.
Your plumber uses hydro jetting- high-pressure water jets- to blast away roots, scale buildup, grease, and debris.
Step 2: Measuring and Preparing the Liner
After cleaning, your plumber takes precise measurements of the damaged pipe section.
The felt or fiberglass liner arrives at your home in a collapsed state. Your plumber saturates it with the appropriate resin- usually epoxy for sewer applications. The amount of resin and the thickness of the liner depend on your pipe diameter and the extent of damage.
This preparation usually happens on-site, though some plumbers use pre-saturated liners that arrive ready to install.
Step 3: Inserting the Liner
Your plumber inserts the resin-saturated liner into your sewer pipe through an access point- either your existing cleanout or a small excavation point they've created specifically for this repair. The liner travels through the pipe to the damaged section, guided by pressurized air or water.
There are two main insertion methods.
- Inversion uses water or air pressure to turn the liner inside-out as it travels through the pipe, which helps it navigate bends and reach the damaged area.
- Pull-in-place involves pulling the liner through the pipe with a cable, which works well for shorter distances and straighter pipe runs.
Step 4: Inflating and Positioning
Once the liner reaches the correct position inside your damaged pipe, your plumber inflates it using air or water pressure. This inflation presses the resin-saturated fabric firmly against the inner walls of your existing pipe.
The pressure needs to be carefully controlled- too little and the liner won't bond properly, too much and it could create wrinkles or damage.
Step 5: Curing the Resin
Here’s where your lining transforms from flexible fabric to rigid pipe. This happens through one of three curing methods:
- Hot water or steam curing is the most common method in residential applications. It involves circulating hot water (around 180-200°F) through the inflated liner for several hours. The heat triggers the resin's chemical reaction, and it hardens into a solid pipe.
- UV light curing is the second most popular choice. A specialized UV light travels through the liner, curing the resin with ultraviolet light as it moves. This method works faster than hot water curing- often completing in one to two hours- and provides excellent control over the curing process.
- Ambient curing is rarely used in residential work. It relies on the natural chemical reaction of the resin at normal temperatures. This method takes up to 24 hours and is only used in rare situations when heat and UV equipment can’t be used.
Step 6: Final Inspection and Reconnection
After the resin fully cures, your plumber deflates and removes the bladder or pressure source that was holding the liner in place. What remains is a brand new, rigid pipe inside your old damaged one.
Your plumber then uses a robotic cutter to open any connections where branch lines tie into your main sewer line. These connections need to be carefully reopened to restore proper drainage throughout your home.
One final camera inspection confirms that the liner installed correctly, all connections are properly opened, and your sewer line is ready for decades of trouble-free service.
When to use CIPP lining, when to skip it: Our Master Plumber Willy Dayton shares insights on when CIPP sewer lining succeeds and fails based on hundreds of successful installations. Read more!
{{cipp-sewer-lining-when-it-works-when-it-doesnt="/blogs/cipp-sewer-lining-when-it-works-when-it-doesnt"}}
Skilled Installation is Essential for Success
CIPP lining delivers exceptional results when installed correctly- but poor installation creates problems that ruin every advantage this method offers. The difference between a liner that lasts 50+ years and one that fails within five comes down to precision, experience, and attention to detail during installation.
Here are the critical steps that require a licensed, trained CIPP lining professional:
- Proper resin saturation. Too little resin and the liner won't achieve full structural strength. Too much resin and you risk excessive thickness that reduces your pipe diameter more than necessary or creates uneven curing.
- Inflation pressure and curing temperature. These make or break the install. If pressure drops during inflation, the liner won't conform properly to the pipe walls, leaving gaps where the resin doesn't bond. If the curing temperature runs too high, the resin can crack or create weak spots. Too low, and the resin won't fully cure, leaving a soft liner that fails under normal use.
- Reopening connections. This requires surgical precision. Cut too little and drainage from fixtures won't flow properly into the main line. Cut too much and you risk damaging the newly installed liner. This step alone can make the difference between a successful repair and one that creates new drainage problems.
Mother’s Master Plumbers have the experience to calculate exact resin volume, maintain precise pressure and temperature, and accurately reopen connections every time. These skills are learned on the job- not from a manual or weekend training course.
Pros and Cons of CIPP Sewer Lining: When to Use It
CIPP lining isn't the perfect solution for every sewer problem. Sometimes traditional excavation and pipe replacement makes more sense. Here's what you need to know to make an informed decision.
Advantages of CIPP Lining for Sewer Repair
- Minimal property disruption – No trenching across your yard means your landscaping, driveway, and hardscaping stay intact
- Cost-effective for difficult access – Repairing pipes under structures or mature trees costs far less than excavating those areas
- Faster completion – Most residential CIPP lining projects finish in 1-2 days versus 3-5 days for traditional replacement
- Extended lifespan – Properly installed CIPP liners last 50+ years, often outliving traditional pipe materials
- Improved flow – Smooth interior surface reduces friction and improves drainage compared to rough, corroded old pipes
- Structural reinforcement – Adds strength to the existing damaged pipe rather than just patching problems
- Chemical resistance – Epoxy resin resists corrosion from wastewater and harsh chemicals that damage traditional pipes
Drawbacks of CIPP Lining for Sewer Repair
- Diameter reduction – The liner takes up some interior space, slightly reducing your pipe's flow capacity
- Not suitable for collapsed pipes – If your sewer line has completely collapsed, there's no space to insert and inflate the liner
- Limited to existing pipe path – Can't reroute your sewer line to avoid problem areas like aggressive tree roots
- Access point requirements – Still needs cleanout access or small excavation points at each end of the damaged section
- Curing time restrictions – Can't use your sewer system during the curing process, which takes several hours
- Not ideal for multiple scattered problems – If damage exists throughout your entire sewer line, full replacement might be more cost-effective
- Temperature limitations – Extremely cold weather can interfere with proper curing of some resin types
When CIPP Lining Excels for Sewer Repair
"Good situations for cured in place pipe liner is in PVC, clay and any other plastic pipes," says Willy Dayton. Willy notes two situations where CIPP lining makes a lot of sense:
"Very deep spot repairs where the pipe is not completely broken, but heavily root intruded," he explains. "We can cut the roots out and install a section of liner through this spot. We don't have to dig, which saves the homeowner money."
Willy also praises CIPP lining as a great option for PVC pipe going under a slab foundation. "Under-slab PVC is one of its best real-world applications," he says.
"If it's a small break under the slab, we install a section of liner through that section of PVC pipe," Willy continues. "It's great for plastic sewer systems where most of the pipe is structurally intact but has localized damage."
Here are some other great situations to consider CIPP sewer lining:
- Pipes under hardscaping – Sewer lines beneath driveways, patios, pools, or concrete surfaces
- Lines near mature trees – When excavation would damage valuable landscaping or root systems
- Partial pipe damage – Specific damaged sections within an otherwise functional sewer line
- Root intrusion points – Sealing cracks and joints where tree roots have penetrated
- Joint separation – When pipe sections have pulled apart but remain generally intact
- Hairline cracks and leaks – Small structural problems that don't require full pipe replacement
- Difficult terrain – Steep slopes, rocky soil, or areas where digging creates safety concerns
- Quick turnaround needs – When you need your sewer system functional again within 24-48 hours
When To Avoid CIPP Lining for Sewer Repair
By contrast, Willy doesn't recommend cured in place pipe lining for older cast iron sewer systems.
"Old cast iron is often severely deteriorated and has heavy channel rot," Willy explains. "The pipe won't withstand the cleaning needed for prep. Missing pipe walls don't allow proper bonding, and lined cast iron ripples- this creates uneven interior walls."
Here are eight times CIPP lining isn't a good choice for your sewer repair:
- Completely collapsed sections – No interior space exists to insert and inflate the liner
- Severely misaligned pipe – When sections have shifted dramatically out of alignment with each other
- Extremely deteriorated pipes – Pipes with such extensive damage they can't support even a reinforcing liner
- Active groundwater infiltration – Significant water entering the pipe during attempted installation
- Bellied or sagging sections – Areas where the pipe has sunk create ongoing drainage problems even after lining
- Need for rerouting – When the pipe's current path is fundamentally problematic and needs changing
- Pipes with sharp bends – Severe angles that prevent proper liner insertion and inflation
- Budget-restricted full system failure – When the entire sewer line has failed and full replacement costs less than lining multiple sections
Considering CIPP Lining in Dallas? Call Mother

CIPP lining offers a trenchless solution for damaged sewer lines that saves your landscaping, cuts repair time, and costs less than traditional excavation when your damage is localized. The process creates a durable pipe inside your existing damaged line- sealing leaks, blocking root intrusion, and adding structural strength.
CIPP isn't right for every situation. Collapsed pipes, severely deteriorated lines, or damage scattered throughout your entire system often need traditional replacement instead. The key is working with a plumber who evaluates your specific situation honestly and recommends the solution that makes the most sense for your home.
Mother's Master Plumbers have installed CIPP lining in hundreds of Dallas-Fort Worth sewer lines. We use high-definition camera inspection to assess your damage accurately, explain whether CIPP lining or traditional replacement fits your situation better, and install your chosen solution with the precision that ensures lasting results.
Interested in CIPP lining repair solutions in Dallas? Call Mother 24/7- our service team will provide the single best solution for your damaged sewer line.
{{sewer-line-repair-and-replacement="/services/sewer-line-repair-and-replacement"}}